| AMTech P-40K-5
by Floyd Werner, Jr. 
The History The heaviest of the P-40 family the P-40K came in three varieties.
The first looked exactly like the P-40E. This was followed by the K-5
version, which has the characteristic large rounded tail section. To
add to the confusion, this tail could also be retrofitted to the P-40E.
The final version of the K had the extended tail like the P-40F. How
the Curtiss and field units ever kept track of what parts were interchangeable
is beyond me. Originally designed as an intermediate aircraft the P-40K
was produced in great numbers with most of the aircraft being in North
Africa, Pacific and in China. For those interested here is a link to my P-40F
article. Obviously many of the things mentioned in this review
are the same as the P-40F so I will not go into it unless something
is different. The Kit The contents of the kit are the AMtech
P-40E kit, including the replacement fuselage, a tan resin tail and
set of colorful decals for three airplanes. The instructions are clear
and concise on where and when to cut the old tail off. The instructions
have you place the fuselage on the instructions and cut off the tail.
The downside to this kit is that it currently a very limited availability
kit being marketed through Hobby Lobby in the US only. Box artwork by
Jerry Boucher shows one of the decal options to great detail. The resin
tail is cast by Black Box and is beautifully detailed. Cutting Edge Cockpit 
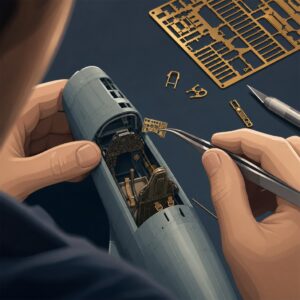
The kit cockpit is actually very nice, but I had a Cutting Edge set
that was beautiful so I just had to use it. The fit was perfect. The
construction is very straightforward and presented no problems whatsoever.
I preshaded the cockpit with flat black and then used Humbrol Bronze
Green. A wash of Burnt Umber in the recesses accentuated the shadows.
I dry brushed the cockpit with zinc chromate and highlighted the worn
areas with a dry brushed with some silver. Some color of Apple Barrel
acrylic paint was used on some for detail painting. Finally, some touches
of a silver pencil made the whole thing come to an end. Wings Nothing different from the P-40F except that I removed the guns and
replaced them with hypodermic needles. Fuselage and Tail Conversion Prior to adding the tail, I recommend that you clean out the excess
resin from the rudder hinge line. It is very thin and easy enough to
do. This allows the see through effect so prominent on the K. The instructions provide you with a drawing, which you then lay, the
fuselage halves over. Then you cut the tail off. I must admit that I
cut my first set of fuselage halves too short. You receive two fuselage
halves per side, so I got another shot at it. I cut long and sanded
it flush with a BAF (Big Ass File). I then followed the instructions
and had no problem with the fit. I used Superglue and accelerator to
set the resin tail in place. The superglue filled any seam. I then sanded
it smooth and had to rescribe any panel lines, but they were no big
deal as they were all straight lines. The horizontal tail planes fit
great to the resin tail. 
The rest of the construction went great with no real problems encountered
anywhere. The only thing I did do that differed from the normal construction
was cut an index card to fit into the openings for the back of the engine
and the inlet on top of the engine. These were colored with black marker
and they only served to prevent a see through effect. 
I’ll let you in on a little hint. The prop spinner does not have a
panel line. The panel line can be easily scribed with a straight pin
held in a pin vise. This is then elevated with post it note pads to
the proper height, hold it tightly in place and spin the spinner. This
ensures that the line is straight and the same height throughout. Painting I used Black Magic CEBM48336 for the P-40K canopy. These fit perfectly
and simplified a job I hate. They stick perfectly and prevented any
bleed. Highly recommended. 
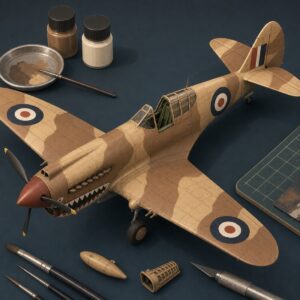
I used Polly-S US Khaki for the tan. I used Black Magic camouflage
masks (CEBM48153), which are actually designed for the P-40B/C but easily
modified for the complex painting. After the masks were laid down I
used Gunze Dark Green for the top camouflage colors. Model Master Enamel
RLM 63 substituted for the bottom side. I liked the tonal qualities
of these colors. Cutting Edge Decals 
Once dry, a coat of Tamiya Clear from the spray can prepared the surfaces
for decals. The kit decals are very nice, but I wanted to do something
a little different. I used the Cutting Edge Decal sheet CED48171 P-40
Warhawk Part 3. It contained a large sharkmouth for “Old Hellion”
from the 18th FS in China. The decals reacted well with MicroSol and
MicorSet. For the sharkmouth I decided on Solvaset because of the complex
curves. I caused the only problems experienced. I touched up the offending
area with Apple Barrel paints. The decals were sealed with another gloss
coat of Tamiya spray gloss and then a coat of Model Master Acrylic Flat. Weathering 
Weathering is done in layers. First chip the paint with silver pencils,
pens, and a dry brush of silver paint. Particular attention is paid
to the high traffic areas. Next, I like to use Burnt Umber artist oils
on all the panel lines. While I’m doing that I also “streak”
oil stains. Next I like to add the gun stains with pastels. I think
pastels give me more control for this area. I start the exhausts with
Tamiya Flat Black heavily thinned. This was built up slowly. Once happy
with the results I used a Model Master Grey and applied it in irregular
patterns. The P-40 has a distinct way the exhaust streaks because of
rain and handling. I took a long soft bristle brush and lightly dipped
it in Turpenoid. I then took the almost dry brush over the grey in a
vertical pattern. I was very happy with the exhausts. I then took a
very thin coat of Tamiya Buff and sprayed streaks from front to back
on the wings and top to bottom on the fuselage. Everything was sealed
with another coat of Model Master Acrylic Flat. Conclusions 

The new P-40K is more accurate than the previous offering by AMT/Ertl.
Because of this it is the best available P-40K on the market. Some will
ask if the tail will fit the Hasegawa kit, yes it will fit. A little
sanding will allow for the resin tail to be inserted in the Hasegawa
kit. If I had to find something wrong with the AMtech P-40K, I would
say that the limited availability is my biggest beef. Ask your people
from the South to look for them at the local Hobby Lobby. You may be
able to order them online as well. While comparisons between the Hasegawa
and AMtech are inevitable, I think this kit from AMtech is up for the
match. The detail is not quite as good and the plastic is a little soft,
but when built it looks every bit the P-40. You don’t have to fill all
those plugs in the Hasegawa kit. I wouldn’t sell off my AMtech kit to
get the Hasegawa, but if you do, I will be there scarfing them up. My
hat is off to AMTech for making the most of their molds. I highly recommend
this kit to everyone but the beginner modeler. I’d like to thank AMTech
for the review example. 

Accessories Cutting Edge P-40E Super Detailed Cockpit CEC48366
Black Magic P-40K Canopy/Wheel Hub Masks CEBM48336
Black Magic P-40B/C Camouflage Masks CEBM48153
Cutting Edge P-40Warhawk Part 3 CED48171 References World War 2 US Army Fighter Modeling, Jerry Scutts & Brett Green,
Osprey Publishing, 2003, ISBN 1-84176-061-7 P-40 Warhawk Walk Around #8, Lou Drendel, Squadron/Signal Publications,
1996, ISBN 0-89747-361-2 Curtiss P-40 in action, Ernest R. McDowell, Squadron/Signal Publications,
1976, ISBN 0-89747-025-7 P-40 Warhawk in detail, Bert Kinzey, Squadron/Signal Publications,
1999, ISBN 1-888974-15-X P-40 Warhawk in World War II Color, Jeffrey L. Ethell, Motorbooks International,
1994, ISBN 0-87938-928-1 © Floyd Werner, Jr.
2005 |