| Revell Curtiss P-40E Warhawk
by Floyd Werner, Jr. 
Why this kit? This kit was originally released in 1978 and re-released in Monogram’s
Promodeller series with a few updates. I had this kit on the shelf and
after watching John Wayne in “The Flying Tigers” I decided
it was time to add a P-40 to my collection. I knew that AMTech was going
to release a P-40E but I needed practice. Practice in the fine art of
scribing panel lines. The P-40 has mostly straight lines so I could
work on them. Besides once the AMTech kit came out I knew I would never
build this classic kit from my childhood. It was off to the workbench. Why these markings? I flew Cobras in 1987 with a pilot named Rick Pierce. Rick’s father
came to Germany and visited. While he was there the unit had a party
like only full blooded Snake drivers can. Well Rick’s father took to
our drinking real well and being a southern gentlemen it only took a
little prompting and he started telling war stories. Rick had informed
us that his dad had flown during World War II but nothing else. As it
turned out Rick’s father was Sammy Pierce of the 8th Fighter Squadron,
49th Fighter Group flying in the Southwest Pacific. Once his stories
started the guys pretty much stopped talking, not drinking just talking,
and listened. If you ever get around pilots there was hand flying, beer
drinking (oh how I miss my German beer), the tales flew and by the end
of the night we were all humbled to be in such great company. Sammy
flew P-40s and P-38s and was an ace with seven kills. Since that night
I have always wanted to model Sammy’s machines. His normal mount was
named “Kay-The Strawberry Blonde/ Pistoff Pat”. There are
no decals for this machine or his other P-40E “Yellow 50”.
I bought an ALPS Printer but so far great results are hard to achieve.
Also the “Pistoff Pat” on the right/crew chief side is not
very clear so that left “Yellow 50” which wasn’t nearly as
flashy but still looked nice. Besides Sammy got two kills in this machine.
This aircraft is depicted on the cover of the Schiffer book “Protect
& Avenge” written by S.W. Ferguson and William Pascalis. 
Personally, I would like decal manufacturers to produce ace sheets.
Depicting all the aircraft of a specific pilot, like Aeromaster did
with Galland, Hartmann and von Maltzahn. Sammy flew two P-40Es (“Kay-The
Strawberry Blonde/ Pistoff Pat” and “Yellow 50”), one
P-40N (“Kay-The Strawberry Blonde/ The Hialeah Wolf”) and
a P-38J (The Strawberry Blonde). The Squadron Signal book “49th
Fighter Group” features pictures and drawings of three of Sammy’s
planes but only the left side. His P-40N will be a future project as
soon as I figure out the printer. Sammy’s P-38 is depicted on Three
Guy Replicas sheet and when I feel froggy I’ll jump all over the Academy
or Hasegawa offering. The kit As you can imagine the quality of the kit is not up to today’s standards.
It was molded in olive green plastic with raised panel lines. Overall
shape is very nice. After I finished the kit I found out that the tail
seems a little too big. No big deal for me. I’m happy with the looks
of the kit. The kit is easy to build up into a real nice model. The
fit was overall pretty good, except the wing root area. Nothing a modeler
couldn’t fix. Before I started to build the kit I started scribing the panel lines.
This was done by using Dymo label tape and a scribing tool. A friend
at the local club explained that you should make only two lines, one
in each direction with even pressure throughout the cut. Once that was
done I sanded off most of the raised detail. I left some raised detail,
as I didn’t think I could replicate it as well as it looked raised.
My kit, my rules. Anyway the next trick to even lines is Testor’s Liquid
Cement. Brush on a light coat of the cement ONLY in the panel lines.
This solvent is strong enough to melt the plastic and smooth the scribed
line. Finally I checked it all with silver paint and one final coat
of sanding. I did all this before I even joined a seam. I was very happy
with the results and will try it again. With my practice done I had
to build the kit. 
One complaint I did have with the kit was that the cockpit was very
sparse, after all it was molded in 1978. True Details came to the rescue
with their P-40 E-N Warhawk Cockpit Detail Set (Set 48451) designed
for the Mauve kit. This resin cockpit set is easily converted to the
Revell kit. You have to cut off the floor enough to get it to fit in
the fuselage and you have to cut the headrest off the seat but other
than that it fits like a champ and looks great. Polly-S colors were
used to paint the interior. Another weak spot was the wheel wells. I used some Eduard stuff for
the wheel wells which spruced up this area nicely and some True Detail
wheels finished the landing gear area. Had I thought about it I would have replaced the exhausts with Moskit
ones but I’ll save them for my next P-40. The propeller spinner needed
a panel line added so I used Post-it notes to scribe it. Post-it notes?
Yes I peeled as many as I need to get the panel line where I wanted
to with my scribing tool held firmly on top of the notes and spun the
spinner on my scribing tool. Accurate, straight and even lines. This
technique works for any circular item. I tried a technique on the wings to get a good fit and some strength.
First I flat sanded the mating surface of the upper wings and the fuselage
join. Once this was done I attached each upper wing only. I really did
this before I even put the fuselage halves together. This allowed me
to compare them and make any small changes. I reinforced the join on
the inside with CA glue. This technique worked really well and no filler
was needed at the wing root. Next I ended up attaching the lower wing
to the upper portions after the cockpit was done. This part required
a little filler, especially in the back. 
Overall I thought the fit was good for such an aged veteran. There
were some areas that required some filler and others that had to be
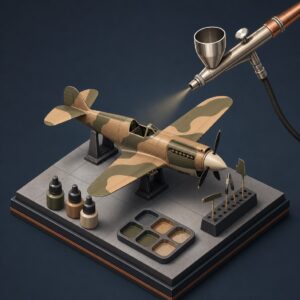
sanded down but nothing that you wouldn’t expect. I painted this aircraft as one of the airplanes that were reacquired
from the British so I tried to get export Dark Earth and Dark Green.
For me these ended up being Polly-S Dark Earth, Aeromaster Dark Green
and Testor’s Model Master Italian Blue Gray. I used Cutting Edge Black
Magic masks designed for the Monogram P-40B but they worked with a little
bit of work and some spare masking material I lightened all colors with
some white and faded the camouflage as I thought appropriate. I have
to say that the overall look of the model was very much what I was looking
for. Definitely something different than German grays. The decals are from various sources, including the kit American markings.
Surprisingly they did not shatter and reacted well with setting solution. Some final weathering with pastels and oils topped off with True Details
canopy and an MV, L 116, lens and I was done. Political Commentary When you build a model you have to ask yourself a couple of questions.
No, not whether it will win a contest, but did I have fun? Does it look
like I wanted to? Most importantly, do I like it? If the answer to these
basic questions is yes then you will know how I feel about modeling.
Too many times modelers build for contests or to impress somebody. If
that is why you build a kit then you aren’t enjoying the hobby. The
possibilities an unbuilt kit holds, the painstaking research, the building
challenges, and the sense of accomplishment upon completion, these are
the things a finished kit brings to me. I know of so many people that start a kit and want to put so much into
it that the kit never gets built. Still there are others that won’t
even start a kit because they have to have everything perfect. Boys
and girls build a kit. Enjoy the process if not the end product. Our
hobby is supposed to be fun. If you win at a contest, great. If not
who cares? 
Try to learn something new on every model. Learn a new technique, a
new paint, a new way to weather, something that makes this one different.
Not all experiments work, but someone use to tell me it isn’t how bad
you screw up (not the words he used, Cobra driver) it is how gracefully
you recover. For me this model was a scribing exercise, it stretched
my limits. Most people lose the motivation and dedication necessary to finish
a kit. It isn’t the finished product, it is the process by which you
arrive at the final results that makes modeling worthwhile. Remember,
it is better to have finished a kit than to never start one. Off the soapbox and back to the conclusion The kit is a cheap offering at the vendor tables (bought mine for $5US)
now and with the True Details resin set the kit can be made into a nice
representation of a P-40E. I really would like to build Sammy’s other
aircraft, especially his P-40E and N. That is a hint to decal manufacturers.
The kit looks great built but if I knew the AMTech kit was going to
be as nice as it is, I probably wouldn’t have started it. As it was,
I finished the kit after the AMTech offering was released. Why? Because
I liked the challenges and it looks good in my display case. Bottom
line, I learned some things, I had fun, it looks like I wanted it to,
and I like it. It will never win a contest but who really cares? Certainly
not me. Finally, remember modeling is fun! References “49th Fighter Group,” Squadron/Signal Publications, ISBN
0-89747-221-7
“Protect & Avenge”, Schiffer Publishing, ISBN 0-88740-750-1
(Highly recommended) Aftermarket Stuff Used True Details P-40E-N Warhawk Cockpit Detail Set, 48451
True Details P-40E-N Wheel Set, 48015
True Details Canopy, Unknown
MV Lenses, L116
Eduard Photo-etch for AMT P-40K, Forgotten © Floyd Werner, Jr.
2004 |