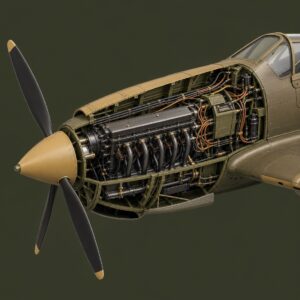
| Scratchbuilders 1/32
P-40 B/C Conversion (kit number 97002) – List price: 60 USD.
Text and photos Rogerio “Rato” Marczak
Actual aircraft photos by Scott Murphy |
| DO YOU WANT BUILD AN EARLY HAWK? Until some years ago, there was no preserved early model
of the P-40 in the world. Now a few of them have emerged from several
restoration projects. The same thing happened to the P-40B/C Tomahawk
in 1/32. Now we have at least two choices, one of them is the subject
of this review. Scratchbuilders has been recognized for their good quality resin kits
focusing on subjects that will most likely never be released in injected
form by a major manufacturer. Contrary to their other offerings, which
are complete models, this one is a conversion to be used along with
the venerable Revell P-40E kit. Basically, the set provides a new fuselage
and nose designed to be matched with the Revell wings and tail. Since
the Revell P-40E is still around for less than 15.00 USD, it won’t be
a problem. 
The box art (Image: Scratchbuilders)
|
| OPENING THE BOX The kit comes in a sturdy box filled with peanut foams
to avoid damage to the parts (nice idea!) and they come in sealed bags.
The conversion consists of a hollow resin fuselage and nose, spinner,
cooling duct, armor plating, and instrument panel on which you glue
a printed instrument panel. White metal parts include the early exhaust
stacks, gun barrels and revised landing gear struts. The clear parts
are vacuum formed. Decals are by Scale-Master. Here is the complete
listing: | Description | Resin | Metal | Vacuform | | | | | | | Fuselage Assembly | | | | | Fuselage | 1 | | | | Cowl | 1 | | | | Reduction Gear Housing | 1 | | | | Air Duct | 1 | | | | | | | | | Cockpit Assembly | | | | | Armor Plate | 1 | | | | Instrument Panel | 1 | | | | | | | | | Landing Gear | | | | | Landing Gear Struts | | 2 | | | | | | | | Misc. | | | | | Spinner | 1 | | | | Spinner Backing Plate | 1 | | | | Exhaust Stacks | | 2 | | | Gun Barrels | | 4 | | | Canopy | | | 1 | | Side Windows | | | 2 | | Armor Glass | | | 1 | | | | | | | Total: | 8 | 8 | 4 | Instructions are in the form of a descriptive text guiding the modeler
through the major steps. Read it carefully before starting, as this
is the better way to know precisely which Revell parts will be replaced.
General directions about the position of some pieces are also given,
and they will help you fit them properly. Scratchbuilders’ instructions
also include two pages of drawings. The first shows assembly sketches
to assist the modeler with the cockpit, tail and the bullet proof glass
inside the windscreen. It also helps to position the new wing panel
lines and the guns. The other drawing is a decal placement instruction
for one of the versions provided with the kit (you have to use the box
top art as a guide for second decal version). 
This is what you get once you open the box (Photo:
Scratchbuilders)
|
| The resin parts are well molded, and virtually free of
bubbles. The cream colored resin is of a very soft type, allowing easy
sanding/scribing/scrapping. Scratchbuilders (I mean the company) did
a good job on their fuselage and nose molds, because the thickness of
these parts are very small considering the size of them. In my sample,
a couple of areas on the fuselage sides are translucent because they
are so thin. I suggest that you inspect your kit and reinforce the inner
side of these potentially dangerous areas with some epoxy glue before
starting. This will avoid the risk of cracking them during handling.
On the other side, the quality of the metal parts is not that good.
More on that later. Now, let’s take a close look at the parts. |
| FUSELAGE The resin fuselage is cleverly engineered, and fits relatively
well to the Revell wings. There are very few spots to sand or remove
resin excess. I found no visible bubbles on my sample, but after sanding/scrapping
the flash, some of them may appear (it happened to me). The panel lines
are recessed but not very consistent, and some of them disappear in
certain areas. An area of major concern is the joint between the resin
fuselage and the Revell wing root. You need to sand and test fit the
parts several times to achieve an acceptable gap and minimize filling/sanding,
but this is understandable in view of the curved root of Revell wing.
The curved fairing on the leading edge of the wing root will need a
lot of putty, but this is an easy area to sand using a flexible sanding
pad. Leave this job to be done after the nose is installed because more
putty will be necessary around the nose joint too. The gap in the lower
wing/fuselage joint is wider though. The Revell tail must be cut off and attached to the new
fuselage, this is not beyond the skills of an average modeler. |
| 
Fuselage

Detail shot of the fuselage area – Front cockpit and wing root 
Detail shot of the fuselage area – Rear cockpit 
Detail shot of the fuselage area – Inside cockpit area 
Wing root to fuselage joint |
| As for the accuracy, the lines of the P-40B/C rear fuselage
are the same of the P-40D/E, except for the cockpit area, and the shape/dimensions
are very well captured there (I’ve used the drawings from the Detail
& Scale book, by Bert Kinzey). The recessed areas of the rear windows
are also correct, but there is no representation of the fuel filler
caps. These are very noticeable on the actual aircraft. The first aid/radio
compartment door on the port side is there, but you should consider
deepening it a bit with a gentle rescribing for good effect. Some panel
lines are missing and you can scribe them very easily provided you have
good drawings. One of the hardest part of this review was to find reliable
scale drawings for the subject…and I’ll tell you, they are not many… |

Checking fuselage accuracy
|
| The blue position light just above the wing fairing is
represented as a recessed circle, although not all early P-40’s had
it – check references for the bird you are going to model. The photo
below shows the AVG veteran Erik Shilling in the cockpit of a fully
restored P-40B adorned with his markings. |

AVG veteran Erik shilling remembering old times onboard
a restored Curtiss H81-A2 (photo:unknown)
|
| NOSE The nose is the most easy recognition point of the P-40B/C.
Scratchbuilders made a good job on the nose moldings, too. For some reason, not all break lines coincide with the
panel lines, but you can take advantage of this by not worrying in preserving
the grooves. Just fill the joint completely and sand. All the fasteners
are well represented in a countersunk fashion. |

Nose 
Checking nose accuracy
|
| The circular carburetor air scoop even has a visible screen
inside. The 0.50″ machine guns fairing are well done and all you will
need is to install the gun blast tubes made of plastic tubing a few
scale inches out. There is a very thin resin skin over the stacks opening.
Remove it and sand smooth to accept the exhaust stacks. Turning the
part upside down, we find a well molded chin scoop for the engine coolant
and oil cooler (another characteristic of early P-40’s). However, comparing
it to drawings and photos, it seems that the chin is excessively deep
(consequence of the bottom nose area being too flat). That is the only
fault in shape I noted. Scratchbuilders included an air duct to be installed
from the inside, replacing Revell’s part #11. Stick with Scratchbuilders’
instructions during this step. The air duct encloses the oil cooler
opening but not the radiator cooler ones. I guess that a thin curved
plastic card can do the job. We included a picture of the P-40C on loan
to the National Museum of Naval Aviation in Pensacola, FL (USA), showing
the arrangement when viewed from the front – see below. The Revell engine is to be used replacing the crankcase with the resin
one. This is enough to account for the visual differences between the
Allison V1710-33 of the P-40B/C and the V1710-39 of the P-40D/E. No
removable access panels here so you may be wondering why to use the
Revell engine. I suspect that this is to eliminate the see-through effect
when looking from the engine air intake or cooling flaps. Also, it helps
to align the crankcase shaft onto which the propeller will be inserted.
The Revell engine is then aligned by the crankcase and the exhaust collars,
so it won’t be loose inside the cowling. |

Detail shot of the nose – Carburetor air scoop
and 0.50″ MG fairing 
Detail shot of the nose – Radiators chin scoop. Compare to the
photo below to see that the openings are too high 
NMNA P-40C – Front view of the radiators chin scoop. Courtesy of Scott
Murphy
In the detail, the arrangement of the coolers from the P-40N under restoration
at Week’s Air Museum (photo:unknown)
|
| Moving aft, we have the major point of deception of the
kit, in my opinion. The engine cooling flaps. After the “Pilot’s Flight
Operating Instructions” (see references) the pilot must open these shutters
during the landing, and no mention is made to close them after the engine
shutdown. That’s why so many wartime photos show them open. Our problem
is that this is a huge opening… you can see the radiators backside,
lots of plumbing and even the engine block from there, as shown in the
NMNA P-40C photo below. In short, the area is screaming for detail if
you want so. Unfortunately the Scratchbuilders representation of the
cooling flaps is very crude. I would recommend you to cut off the flaps
from the nose and scratchbuilt new ones. Any attempt will give better
looking results than the kit part. Another option is to use the Eduard’s
detailing set for the Revell P-40E, which comes with photoetched flaps: – Eduard Accessories – Product #32017 P-40E Warhawk (for
Revell kit). A hint of the contents of this set can be found at ARC’s
instructions sheet library. |

Detail shot of the nose – Radiator flaps 
NMNA P-40C – Aft view of the radiators shutters. Courtesy of Scott
Murphy
|
| The other parts to be used here are the reshaped resin
spinner and its back plate. They will be installed along with the Revell
propeller later in the assembly. The white metal exhaust stacks are
very crude and most of you probably won’t like it. The kit instructions
claim that you can use the later exhaust style which comes with the
Revell kit, but assert this with your references because only the a
few P-40C’s used it. |

Other parts for the nose area 
The white metal early style exhaust stacks
|
| Now that we are talking about the propeller, it is worth
it to note that many early WWII American aircraft had the propellers
painted in black on the back face of the blades only. The front faces
were generally left in natural metal. Seems insignificant, but this
will determine the color of the propeller stencils to be applied. Most
stateside early P-40s used that scheme as a factory finish. The black
was not applied on the entire blade, but some inches from the blade
root outwards, as shown in many photos. On the other hand, it doesn’t
seem to be the case of British Tomahawks and, in addition, there was
field repainting, propeller substitution for newer parts etc. The USN
photo below shows a typical P-40C in factory standard, while the AVG
picture illustrates many interesting details found in a front line machine. |

A factory fresh P-40C (photo: National Archives) 
A Flying Tiger wartime photo showing many interesting details (photo:
unknown)
|
| COCKPIT The cockpit is basically an adaptation of the Revell cockpit.
For the detailers this sounds like a too simplistic solution, because
the cockpits of B/C models had visible differences from the one of the
E model. A new resin bulkhead is provided to match the resin fuselage,
and the fit is good enough (clean it carefully). The characteristic
“inverted T” control panel is also given. You have to cut the printed
B&W control panel provided and glue it on the resin part. This is
a questionable approach for an open canopy. A simple solution is to
cut a thin plastic card using the resin control panel as a guide and
punch out the holes for the dials. Paint this new front black and glue
it on top of the printed panel. There is no representation of the aft
ends of the two machine guns mounted in the cowling. Find something
in your spare parts box… The major problems of the cockpit are the Revell parts
themselves, since the conversion uses most of them, and they are very
crude. The sidewalls, seat, pedals, floor…everything is typical of
a late 60’s vintage kit: the floor is flat and should be curved (the
cockpit floor of the P-40 was the wing upper surface), the seat is useless
and the sidewalls are wrong even for the E-model.. Jerry Rutman’s detail
parts are handy here. Although they are intended for the dash-E, some
parts can be used/adapted for a dash-B/C. Check it out in our J
Rutman accessories page or in a full
review by Brett Green, from Hyperscale. The seat for the B/C
model was the same that the one in the E-model, but verify your references
about the slight differences in the sidewall consoles. Also, many PE
parts of the Eduard set cited above can be used. Well, if you are thinking of a detailed model, you have
to do something here. Besides the control panel, you will need at least
a more convincing seat as well as sidewalls with the proper modifications.
I’ll leave you with some pics of the NMNA P-40C cockpit in case you
need a starting point. I also scanned a few pertinent details from the
“Pilot’s Flight Operating Instructions”. |

Resin control panel and bulkhead 
The printed control panel 
Control panel of the NMNA P-40C. Courtesy of Scott
Murphy 
Left sidewall of the NMNA P-40C. Courtesy of Scott
Murphy 
Right sidewall of the NMNA P-40C. Courtesy of Scott
Murphy 
Some cockpit details from the “Pilot’s Flight Operating Instructions”
|
| GUNS One of the high points of the conversion, the wing mounted
gun muzzles are provided as white metal parts and they are exquisitely
molded. Take care during handling/cleaning because the metal is quite
soft, some of them were bent in my sample. Just roll each one on a flat
smooth surface to make them straight. The instructions sheet include a 1/32 drawing of the bottom
wings showing the correct positions of the wing guns and the spent casing
chutes, a bit crude but correct. This drawing makes the task much easier
in case you don’t have your own plans in 1/32 scale (the P-40B/C had
two 0.30″ guns per wing, instead of the three 0.50″ found in later versions). |

The white metal wing mounted gun muzzles
|
| LANDING GEAR The white metal main landing gear legs are one of the
poorest parts of the conversion. The instructions claim that they have
the correct length. This is because the Revell landing gear is designed
to be retracted. Had the legs had the correct dimension the wheels wouldn’t
fit into the wells. However, the white metal legs provided are just
lengthened metal copies of the Revell parts. Considering the somewhat
crude casting of our sample, it seems better to lengthen the Revell
legs. The actual P-40 landing gear was an engineer’s dream,
full of mechanisms and hinges to rotate the wheels in order to fit them
into the bays. An expert modeler will test his skills to scratchbuild
a landing gear of that complexity, as Revell representation is very
symbolic. Even the doors lack the proper details. Again, the J
Rutman accessories set will save a lot of time here, as it comes
with a complete new landing gear – including the wheel bays – to fit
inside the Revell wing. Our friends from LSP staff reported that the
set fits very well. I included one more picture of the P-40C at NMNA along
with some drawings to help on this area. If you are going to the make
your own details, you can save some work by depicting a canvas covered
wheel bay and a tail wheel with canvas boot. The canvas was factory
standard to avoid dirt and dust entering the wing, but they were prone
to tearing under heavy use, so that they were generally removed by the
crewman. |

Main landing gear white metal parts 
The main wheels retraction mechanism and strut of the NMNA P-40C. Courtesy
of Scott Murphy
|
| CLEAR PARTS There are 3 vacuum formed clear parts for the canopy,
incorporating a bit overdone frame lines. The rear windows are not flat,
but curved – as they should be – following the fuselage cross section.
All parts are very translucent and made of a material called Zivac.
The instructions claim that bonding agents like Tenax-7R will work with
that material. I tested Tenax-7R in a previously trimmed test stripe
and it actually reacted with the material. On the other hand, Humbrol
and Testors liquid cements didn’t even stain the sample. Be warned then… The sliding part comes attached to the windscreen, a careful
trimming will be necessary to pose it open. Even if you are not going
to cut them apart, I recommend you to turn the part up side down and
then pour some plaster until the cavity is filled. Wait the plaster
dry and trim the borders. This will give you a more stiff surface to
run the knife. Once done, pop the plaster block out of the clear part
and rinse with water. |

The clear parts
|
| DECALS Two versions can be made out of the decal sheet: – Curtiss H81-A2 s/n P-8173 flown by the AVG ace R. T.
Smith. This is the famous #77 seen in many AVG wartime photos. – Curtiss Tomahawk AK498 flown by the 250 Sq. ace Clive
“Killer” Caldwell during the Africa campaign. There are many important notes about the correct use the
markings. Read the instructions carefully. For instance, the Disney’s
Flying Tiger is included in the sheet, but it was not used on #77. A
nice touch is the pair of Chinese roundels to be used on top of the
wings, which are printed in a slightly toned down blue to simulate fading
(always more aggressive on top surfaces). You must follow Revell instructions
for the stencil locations, although the numbers don’t match (this is
clearly noted in the instructions too). As for the quality of the decals, they are very good,
but my sample had the red layer out of register. This is not noticeable
except for the red circles inside the eyes above the shark mouth. It
didn’t pass by Scratchbuilders quality control because they kindly provided
a separated pair of eyes to replace those defective. The decals are produced by Scale Master with the popular
Invisa Clear system. If properly applied, I don’t believe they will
reject any setting solution or present silvering problems. |

The decal sheet 
A zoom on the decal sheet details 
AVG ace R. T. Smith showing his five kills tally. Rangoon, Burma, late
1941
|
| FINAL COMMENTS Many modelers claim that the real Flying Tiger was the
P-40B/C. Personal tastes apart, you won’t have many choices to make
an early hawk in 1/32. And there are many options to choose from for
this conversion. If you don’t want to stick with the R. T. Smith bird,
you can choose one among the AVG famous pilots: Dick Rossi, Charlie
Bond, “Tex”Hill, Charles Older, Erik Shilling and even Gregory “Pappy”Boyington.
Although the Disney’s Flying Tiger is provided in the decal sheet, most
AVG P-40s used to wear some sort of artwork. This can be a problem unless
you choose a machine from the first days of the group (initially AVG
squadrons flew plain H81-A2 with just the fuselage numerals ad no elaborate
artwork). Whatever the case, remember that the AVG machines were Curtiss
Hawk H81-A2 (similar to the P-40C) which had been built for export to
Britain. As a consequence the pitot tube must be of the cranked type
and the factory applied colors didn’t match perfectly the usual
RAF Dark Green/Dark Earth/Sky cammo. Reportedly, Curtiss used DuPont
Dark Green 71-013 and Dark Earth 71-009 for upper surfaces and possibly
Light Gray 71-021 for undersurfaces. The question about the best FS
matches of these colors is still open and you are on your own here.
Moreover, AVG aircraft were generally heavily weathered, given the nasty
conditions they operated (see photo below). All I can suggest you is
to read the good discussion on the subject in Bridgewater’s recent book
(see references). If you are going to a British Tomahawk, the same comments
apply. As usual with limited run kits, you won’t find aftermarket decals
for this bird (that I’m aware of). |

A widely published color photo of AVG flying formation
|
| A good notice is that the conversion can be used to make a P-40-CU
– the very initial version with lighter armament or finish it as a pre-war
stateside P-40B. Ok, they were just olive drab 41 and gray, but I think
what will make such a model different is the version. After all, an
aviation aficionado will promptly note the differences from the original
Revell kit. Other interesting possibilities are those “Pearl Harbor
defenders” stationed at Bellows and Nichols fields during the attack
(some of them actually engaged the Japanese and downed a few) or the
desperate fighters of the 20th Pursuit Squadron at Clark Field, Philippines
during the first days of the war. Now if you want something very unusual,
there was the P-40B used by the Russians. Turning back to the conversion, I think that the only
problem with it is the Revell kit itself. I didn’t covere here all the
work you have to do with the cockpit, landing gear, wings and tail to
leave the Revell parts accurate because this will be addressed in another
review. I’m not saying it is a bad kit, but it includes some toy like
features which result in serious inaccuracies. The Scratchbuilders bits
will do their part. I can anticipate, however, that the raised panel
lines in the Revell parts are not consistent with the recessed ones
in the resin fuselage and nose. |

Curtiss test pilots Herb Fisher (left) and Ed Elliot
prior to test flying several brand new P-40B fighters (none have guns
installed)
|
| Other important details are the pitot tube, which must be cranked for
British and AVG machines (the boxtop artwork is wrong on this) and straight
for the American ones. Also, there’s no gun sight ring or mast, but
they can be stolen from many photoetched sets. Don’t forget to install
these items in offset with the fuselage center line. My references for this review were: 1.) McDowell, E. R.: Curtiss P-40 in Action, Squadron
Signal Publ., 1976. 2.) Kinzey, B.: P-40 Warhawk in Detail – Part 1: YP-36
through P-40C, Detail & Scale Vol.61, Squadron Signal Publ., 1999. 3.) Kinzey, B.: P-40 Warhawk in Detail – Part 2: P-40D
through XP-40Q, Detail & Scale Vol.62, Squadron Signal Publ., 1999. 4.) Drendel, L.: P-40 Warhawk Walk Around, Walk
Around Number 8, Squadron Signal Publ., 1996. 5.) Famous Airplanes of the World, No. 39: Curtiss P-40
Warhawk, Burindo, 1993. 6.) Bridgewater, H. C.: The Curtiss P-36 and P-40 in USAAC/USAAF
Service – 1939 to 1945, Combat Colours Number 3, Guideline Publ., 2001. 7.) Bridgewater, H. C. and Scott, P.: Pearl Harbor and
Beyond – December 1941 to May 1942, Combat Colours Number 4, Guideline
Publ., 2001. 8.) Technical Order No. 01-25CF-1: Pilot’s Flight Operating
Instructions – P-40D and P-40E Airplanes, AAF Headquarters, Air Service
Command, Patterson Field, Fairfield OH, Feb 1943. 9.) P-40 Fighter Manual, AAF Headquarters, Office of Flying
Safety, 1943. The last two are more difficult to obtain but the others
are easily found |

The Tomahawk as delivered by Curtiss to the RAF. Note
the cranked pitot tube and the longer blast tubes
|
| SUMMARY As I mentioned, the major problem with this conversion
is Revell kit. Had Scratchbuilders provided a complete cockpit I would
rank it four stars – no doubt. For you early hawks fans the only other
option is the Craftworks P-40C, but costs 125 USD!!! This model is an excellent choice if you want to try a
resin model in 1/32 for the first time. It is relatively easy to build
and the finished product will fill a huge gap in any collection of American
WWII aircraft. By adding some details and correcting the most obvious
Revell flaws, I’m convinced you will have a lot of fun and the result
will be a truly unique model. |

This is the result (Photo: Scratchbuilders)
|
| ACKNOWLEDGMENTS We would like to thank the support Forrest Cox, owner
of Scratchbuilders, for providing the review sample. Also, our “inspiring
master” Scott Murphy
for consenting the use of his NMNA P-40C walkaround photos. |
© ‘Rato’
Marczak 2002 |