| Tomahawk IIb of 112 Squadron RAF
by Simon Olsen 
In 1941 RAF airforce Tomahawks flew from dirt strips bulldozed out
of the desert. Subjected to blistering heat and sandstorms, disappearing
in a cloud of dust and stones every takeoff and landing, after a few
week’s front line duty they looked like they had been there for years.
The perfect subject for the beginner modeler – mistakes passed off as
“weathering”. 
 Aside Aside
from throwing glue and paint at Airfix 1:72 kits as a kid, my first
model was started in May 2004 after receiving an old Revell P40E that
the good wife purchased through e-bay for my birthday.
When I went to my local modeling shop to “buy a few paints and
things” and came back many hours later with compressor, airbrush
and bag loads of other “essentials”, I think she began to
wonder if maybe that old plastic kit was such a good idea… Four quickly-built OOB confidence-building kits later, I decided to
tackle Trumpeter’s P40C, assisted by the Cutting Edge resin (corrected)
cockpit and flexible belts set and EagleCals
#71-32 decals. AN413 “Nan”, was PO Jack Bartle’s plane between September
and December 1941. Jack was one of many Australians who became aces
with RAF Squadrons in the desert. Most importantly, this plane “has got teeth” which is critical
to a 3 year old modeling-orphan, who may have lost his daddy for a few
months, but who now knows for sure that “Tomahawks eat Messerschmitts!” Initial construction of the “model within a model” engine
inspired me to go boldly where no-modeler in their right mind would
go with so little experience and so little (as I was to learn) essential
reference material. 
With the starboard covers off, I started to appreciate the extent of
the challenge I had taken on. I quickly realised how much research is
needed for scratch building. Those empty spaces don’t just fill themselves
up! Grainy old photos don’t give away many secrets about what lies in
the shadows. I also learned that model manufacturers tend to take little short-cuts,
that made a simple job suddenly very complex. The complete lack of any
internal wing section (upon which the cockpit sat) provided my first
unplanned construction job. At least, finally realising that the engine
mount positioning was completely fictional helped me to understand why
I (for love or money) couldn’t get engine parts and plumbing to locate
in relation to each other like in the photos! (I noted with admiration
how Brian Cauchi easily fixed this.) 

The Cutting Edge cockpit, my first attempt at a resin ‘pit, was a joy.
However unlike the Trumpeter kit gauge acetates, the replacement ones
were incorrect. Some hours of cutting and relocating individual gauges
from each sheet fixed this, but…. Also the charge levers for the
wing guns were incorrect (2 only) for the Tomahawk. I retrofitted the
kit originals. 
The RAF GM2 gunsight was fully scratched (yeah, like you can’t tell!)
and once again, a real challenge in getting any information. Grainy
photos and nothing much on the net to help. No resin replacements, so
based on the information I could obtain, it was either purchase a whole
Hasegawa Spitfire V kit or DIY. I was reasonably pleased with the result.
New eyeglasses would have helped me here though! I am still unsure of
scale, but it seems right. 
Cockpit work also included brass throttle quadrant linkages, re-doing
the manual fuel pump lever, attaching rudder linkage cables and the
rear-view mirror. The worst part of whole kit is the armored glass framing. It looks
shocking and if I had realised how badly it was going to turn out, despite
being absolutely terrified of clear plastics, I would have bitten the
bullet and tried to scratch build new framing (which my references said
had a grey painted metal frame BTW). I was pleased with the level of detail that my hit and miss weathering
cocktail of oil wash, pastel and dry brushing brought out in the cockpit
and elsewhere. Little bits of added detail such as internal door structure
and brass actuating rods set of the landing gear nicely. 
The extra radio mast was fitted (this Tomahawk had both VHF and UHF
radios). The kits dreadful raised radio access door looks OK after sanding
down, re-doing rivet detail etc. Other spuriously raised features were
similarly treated. 
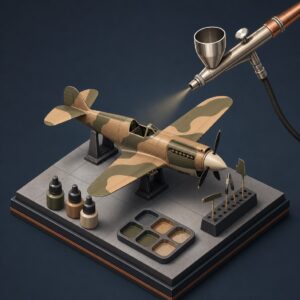
Gunze Sangyo acrylics were used. The model was first sprayed silver
and pre-chipped with Maskol. Canvas control surfaces were separately
undercoated with Sail Colour (I was unsure about fabric priming). I
then did a “factory” paint of RAF Dark Earth and thin RAF
Dark Green. I then did some more “chipping” on the green and
did the RAF Middle Stone soft-edged field re-spray. I was relatively pleased with the end result and in most part, the
weathering-through-paint layers effect works well. Although, it’s not
perfect… more care and in particular, an initial hard-edge masking
of the “factory” green/dark earth scheme would have avoided
a banding around the dark earth caused by overspray. I’ll need to learn
more a lot about how planes were actually painted to better develop
this approach. I kicked myself when I realised too late that I should have applied
the same treatment to the prop spinner, which would have come in RAF
Dark Green and received the characteristic desert hawk red in the field.
Chipping through the red would have revealed green as well as metal. 
The RAF Azure underside was mixed with the help of wildly varying advice
and colour charts, and most importantly, by matching to a discontinued
(I think) Areo Master Warbird Colour enamel (single dusty pot found
by chance and now carefully stored). Violet is the clue. So finally, after about four months and I care not to think how many
hours, I have something which I feel might, for a modeling novice, be
considered worthy of gracing the pages of LSP. The never ending routine
of fill, sand and repeat tidying up a million ejector pin marks is but
a distant memory now. Brian Cauchi it ain’t! But it’s better than the
Airfix glueballs I used to make. Many thanks to LSP and contributors for all the tips and inspiration
that has gotten me this far. Thanks also to David McFarlane at Modelsports,
Fairy Meadow, NSW, for the advice and encouragement and special thanks
to Gary Silva for the great camera work (I think we managed to keep
the beer bottles out of shot). 
© Simon Olsen 2005 |