AMtech P-40F “Short Tail” Conversion
by Floyd Werner, Jr. The History As a little kid I remember building the 1/32nd P-40E from Revell and
from that moment forward when I think of a World War II fighter I think
of the P-40. I know that this will come as a shock to some of you who
would assume it would be the Bf-109 (OK, I got that out of the way.
I said Bf-109 in this review), but it really is the P-40. Menacing shark
mouth, big cowl scoop and just classic looks. Until the AMT, now AMtech
offerings the options open to a modeler were limited, but that has changed
now and you can build and almost every version of this venerable fighter
with recessed panel lines and good fit. The P-40F was Curtiss’ attempt at mating the Rolls-Royce Merlin with
the P-40 airframe to gain airspeed at altitude. The Alison-engined P-40E
was limited because it lacked a supercharger. The P-40F would change
all that. The Rolls-Royce Merlin manufactured in Detroit by Packard
would provide a two-stage supercharger. The initial thought was that
the top speed of the aircraft would significantly improve as would higher
altitude performance. This just didn’t work out as well as planned.
The top speed increased a whopping FOUR knots and the altitude increase
was only 3, 000 feet. The first P-40Fs, P-40F-1-CU, utilized the same
airframes as the P-40E. Approximately 699 “short-tailed’ P-40Fs
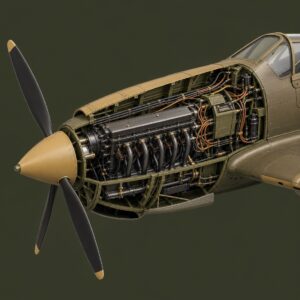
were produced. The Rolls-Royce engine caused a redesign of the nose. The carburetor
scoop that was so prominent on the top of the P-40B-E nose was no longer
needed as the Merlin used an updraft type carburetor. The nose was also
changed by moving the scoop slightly forward and deepening it slightly
to allow the installation of the radiators in the scoop. The later versions of the F had a lengthened fuselage in an attempt
to compensate for longitudinal stability problems. This solution was
only marginally effective. The F model P-40 was used in the MTO and the Pacific theaters. The
P-40F was preferred in the Mediterranean because it was the best variant
against the German fighters and the availability of spare parts. Now
onto the model. The Conversion Set The AMtech conversion set includes a resin nose, new decals, and a
new instructions sheet. The resin nose is bubble free and molded in
a hard pink resin. The modeler will have to provide an AMtech P-40E
kit. The new decal sheet for contains all the markings for three airplanes.
One is a Libyan based sand over neutral gray aircraft, LtCol Bates’
desert camouflaged machine, and a rare Pacific based olive drab over
neutral gray aircraft with white recognition stripes are the marking
options. The instruction sheet covers the needed cuts for the conversion.
The pictures are large and easy to understand. The nose should work
on any P-40E kit, however, the instructions show only the AMtech kit.
More work may be required on the Promodeler or the Arii/Otaki kits. The Donor Kit The AMtech P-40E kit has some mold mistakes, but they are easily taken
care of. The right side of the fuselage has slight mistake on the aft
part of the fuselage but it is easily taken care of with sand paper.
The slight step on the fuselage half is easily taken care of with a
few swipes of the sanding stick. Both corrections are easily done by
even a beginning modeler. If you get a new release of the P-40E a replacement
fuselage is included making the clean up that much easier. If you have
an old AMtech P-40E with the step in the aft part of the fuselage all
you have to do is send the UPC to AMtech. They will replace the fuselage
half for you, free of charge. All the new kits come with a replacement
fuselage. That is customer service. Cutting Edge Cockpit The kit cockpit is actually very nice, but I had a Cutting Edge set
that was beautiful so I just had to use it. The construction is very
straightforward and presented no problems whatsoever. The molding was
up to the normal excellent quality. The fit was perfect. I preshaded
the cockpit with flat black and then used Tamiya Imperial Japanese Navy
Green. Shock and horror! Yes, it isn’t what is called for but it looked
“correct” and is a reasonable match for Bronze Green. A wash
of Burnt Umber in the recesses accentuated the shadows. I dry brushed
the cockpit with zinc chromate and highlighted the worn areas with a
dry brushed with some silver. Some color of Apple Barrel acrylic paint
was used on some of the detail painting. Finally, some touches of a
silver pencil made the whole thing come to an end. Wings I decided to build the wings next. No reason just thought I would save
the conversion to last. The wings are great. Fit was exceptional and
no real problem was encountered. I did notice that the wheel well side
that faced the fuselage was not closed off. I fixed this with some .005
sheet styrene. You have to be careful so as not to interfere with the
fuselage fit. Basically, make sure the styrene fits under the upper
wing and you will have no problems. I drilled out the end of the guns. Fuselage and conversion nose The Osprey book on US Army Fighters by Brett Green and Jerry Scutts
provided a color step-by-step photo essay of how to convert the nose.
The instructions provided by AMtech are easy to understand but having
the color photos was nice. I recommend that you cut each fuselage before
you cement the halves together. It is better to cut too little and have
to sand than to cut too much and have to build up. Once both halves
are cut I glued the fuselages together. The fit of the fuselage was
very good. I always, without exception, fill the entire seam, there
or not, with superglue. I do this for a reason. I only have to sand
it one time, usually. If I didn’t apply the superglue I would have to
sand, check for seams, fill and sand again, ad nausea. Why bother sanding
numerous times when I can do it one time and be done. Less detail lost
and less sanding which I personally don’t particularly like to do. It
speeds the building process too. I get over the “oh the model had
a seam that ran down the …”. With my method who cares? After removal of the mold block on the resin nose I simply slid the
nose into the fuselage. The initial fit was very good. I did need to
sand some to get a good square fit, but it was relatively easy. Taking
a hint from Brett, I added shims on the resin nose to get the plastic
fuselage to spread as needed. Some places required .005 and some .010.
Test fit, test fit, test fit. Once everything was shimmed the nose was
glued into place. I needed just a hint of filler here and there and
associated sanding. Before I could add the wings I had to make a cutout in the wing center
section. This was the hardest part of the whole conversion. Despite
the warnings of AMtech and Brett I cut too much off. It sounds worse
than it was. Take the raised center section off back to the lower keel.
That cut is the easy one. The side cuts should be cut at an angle. I
didn’t and actually squared it off. Again, no real problem. Once I got
it close I added the wings. The wings were a little flat so I sanded
some the wing joint on top. Then when I was happy with the fit, I used
tape to hold the wings up to the fuselage and glued everything in its
place. After the wings set up I needed to fair in the area on the keel on
the sides. I should not have squared it off. I just used some epoxy
putty to fair in the nose to the wings. I was lucky enough that I did
not even need to sand it when it was done. The conversion instructions call for the cowl flaps to be built from
styrene. This is actually not that hard as it sounds. AMtech provides
a 1:1 template for making the flaps. The builder will have to make these
from sheet styrene, which is not provided. Once you have that done,
attach the flaps with superglue and you’re done. The whole process takes
less than 15 minutes. Look at my photos for reference. This is actually
the hardest part of the whole conversion. Before adding the tail surfaces I took the time to rescribe some panel
lines on the fuselage and nose that had gone away through my heavy handed
sanding and to make the front panels on the conversion correct for the
F model. The tails fit without any problem. I dipped the canopy in Future and when dry I masked with Tamiya masking
tape. Painting I chose to build LtCol Bates machine, X0-1 “Lil Joe”, which
was in a standard desert scheme of Middle Stone and Dark Earth over
Azure Blue. Using the color photos in Ethell’s book I decided to use
Polly-S paints. I sprayed the whole airplane with Tamiya Fine Primer
(white) to check for flaws. If you haven’t tried this primer it is fantastic.
It is in a spray can. It is very difficult to lose detail even with
heavy coats. I like it because it covers plastic, resin, and superglue
flawlessly. It feathers real nice when dry and can be over sprayed without
a problem. Love it! Did I mention that it is a great way to look for
flaws? Once that had dried I preshaded the airplane with flat black.
Now the airplane looked like crap but that would soon change. I applied
the Azure Blue to the bottom of the airplane, letting some of the preshading
show through. I lightened up the Azure Blue with some white and lightened
some panels and the control surfaces for variation. Next the Middle
Stone was applied to the entire upper surface after masking off the
areas to prevent overspray. This was lightened with white, twice, and
like the blue added to panels and control surfaces. Remember this is
a desert machine and would be faded a lot on top. Next I needed something
that would mask a hard edge and not be too time consuming. I used Blue
Tack to make the pattern and then I sprayed the Dark Earth. Again it
was lightened with white, twice. All this lightening made touch ups
difficult but because I couldn’t get it exactly correct another layer
of color was added during touch up. Once the upper surfaces were painted
and masks removed I used a Tamiya Desert Yellow highly thinned sprayed
over the entire topside. This blended everything together. Painting the prop was straight forward. The spinner was painted with
Insignia Red and faded with white. A coat of Tamiya Clear prepared the surfaces for decals. The kit decals
are very nice. My example had the white of the national insignia slightly
off register but nothing really objectionable or noticeable. Microscale
prints the decals so they are thin, opaque and responded well to the
Micro Sol and Set system. Once the decals had dried I oversprayed with Tamiya clear again followed
by a coat of Polly-S Dust to the wings and spine of the fuselage. This
started the weathering process by “fading” everything together.
A coat of flat prepared the aircraft for the real weathering. I like to attach the fiddly pieces now. By fiddly I mean the landing
gear, doors, sway braces, exhaust stacks and pitot tube. Weathering Weathering is done in layers. First I like to use Burnt Umber artist
oils thinned with turpenoid on all the panel lines. While I’m doing
that I also “streak” oil stains. The next step is to chip
the paint with silver pencils, pens, and a dry brush of silver paint.
Particular attention is paid to the high traffic areas. Next I like
to add the gun stains with pastels. I think pastels give me more control
for this area. I start the exhausts with pastels as a way to guide my
airbrush. The exhaust streaks were built up with a base coat of Tamiya
flat black and red brown mixed 50/50 and heavily thinned. This was built
up slowly. Once happy with the results I used Tamiya Deck Tan to add
the color to the exhausts. I was very happy with the exhausts. Some
brown pastels were added to the wing root and then everything was sealed
with another coat of Model Master Acrylic Flat. Finishing up Adding the canopy was the only thing left to do besides the antenna.
The front and back part of the canopy fit like a champ, but the center
section did not fit that well. If you want to display it open you will
need a vacuformed replacement. This is what I did, using Squadron’s
excellent canopy. If you display it closed there should be no big issue.
I attached the aft windows with just a little bit of Future. The only
thing left to do was to add the antenna and paint the navigation lights
with silver and Tamiya clear red and green. Conclusions This offering from AMtech is very nice and offers a version of the
P-40 not previously available on the market. This is my second P-40
kit and my first AMtech one, I can say that this kit is the better of
the two kits for fit and ease of construction. There are mold flaws
on the fuselage halves but these are easily taken care of with a few
swipes of a sanding stick, really a non-issue. As for the conversion itself, having to build the cowl flaps may be
beyond beginner modelers. The resin nose is very easy to add and this
kit is a great way to try a resin conversion. I thoroughly enjoyed the
whole build and it took next to no time to complete. The decal options
will make this kit a welcome addition to the P-40 heritage. My hat is
off to AMtech for making the most of their molds and providing the modeler
with new versions of a great airplane. I highly recommend this kit to everyone but the beginner modeler. The conversion is available directly from AMtech through their website
at http://www.amtechmodels.com
. They will also be available through select hobby shops. I’d like to thank AMtech for the review example. Accessories Cutting Edge P-40F Super Detailed Cockpit CEC48367
True Details P-40E-M Wheel Set 48015/460014
Squadron Curtiss P-40E Kittyhawk vacuform canopy 9537 |