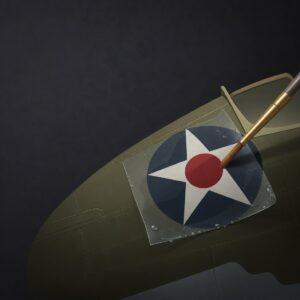
| Colonel Robert L. Scott’s P-40E “Flying Tiger”;
Part Three
by Rodney Williams |
Before you buy a product, wouldn’t you like
to know something about it? Yes, I think most of you would say yes!, yes!,
yes! In 1996, one of the so named “IPMS/USA” “E” board
members by the name of Chuck Davenport called me and ask a few question
concerning me making this 1/32 scale P-40E. He had just received a photo-etched
set for the 1/32 P-40E from “EDUARD.” I said I would use it
and put the review in the Journal magazine. Chuck sent it to me free
of charge. I used what I could, which was not much, and scratch built
the rest. This first photos shows some brass boxes, and frame work, along with
the plans. Take note, that the boxes are too wide and do not fit within
the frame work. In my “only” story, the editor David Von Almen
mentions the photo-etched parts, but leaves out the “negative”
comment, and the photo as well. |
| |
| When I contacted Chuck, he did not remember anything about it, furthermore
he ask me: “Who are you?” I joined IPMS/USA in 1984, and became a judge
in 1986. I missed two contests between 1986 and 1998. I won first place
awards at every show, and even judged with Chuck, and I wrote stories
“free of charge,” for the Journal magazine. No wonder I quit
IPMS/USA. I have no idea what the price was for the photo-etched set,
but I paid
$20.00 for the “F4U-1D Corsair” set by Eduard back in 1996.
So far, I have not used any of the F4U-1D items in my 1/32 scale F2G
models. No matter what you pay, you, the consumer, should get your monies
worth. The seat is ok, but to me it was useless! The kit was designed with
a cockpit floor in it, great! It was too low, thus “EDUARD”
designed their seat to fit the kit floor. The floor of the P-40E is
none other than the center section of the top of the wing. When I scratch
built my first seat using Eduard’s pattern, the seat was too tall and
went above the head rest. I did some homework, and the second seat turned
out to perfection. |
| |
This set of photos show several little cockpit
parts, which are all made by hand. You will note by looking at the two
gun sight rings, that one is bigger than the other. I did not like the
one on the left, as I felt that the cross hairs were a tad to big, so
it was back to cut and fit, then trial and error, until I got it right. |
| |
| THE COCKPIT LIGHTS: Long ago I bought several sizes of clear acrylic rod , with different
diameters. I cut off short links of it, then chucked them into my variable
speed 1/4″ drill. On slow speed, it turns at 170 r.p.m.’s. As the
drill is turning, I simply place a number 2 cut file on to the plastic.
Using water on on file, I start removing the plastic carefully. Once
I get it cut down near to the size desired, I use my #4, and #6 cut
files. Next, I sand the parts while they are still in my drill using
#400 to #1000 grit “wet” sandpaper. I also round off the end,
and sand it down to #2000 grit. I apply a small amount of “Blue
Magic” polishing cream on a rag. I switch my drill to high speed,
(400 r.p.m.’s) and polish the end. When it is painted, the end looks
like a real light. |
| |
| THE HEAD REST: I got the bright idea to use some of my “thin” leather to
make it. I made two molds, one bigger than the other one. I soaked the
leather in water, then stretched it out and placed it on the female
mold. I just pushed the male mold into the female mold. I place a .060″
thick square section of flat styrene stock on each side of the mold,
then clamped it together. A day or two later, when the leather had dried,
I removed the .060″ thick styrene pieces, then trimmed off the
excess leather on the
back of the male mold. I tacked the edges of the leather to the edge
of the styrene with thin super glue. I removed the male mold, then added
more “micro” dots of super glue to the back of it. “PRESTO”
I have a head rest with real leather on it. |
| |
The side windows became complicated. If I would
build the model again, I would not do it this way, and why I did it this
way, I have no idea. The little black round item behind the left side
window represents some type of horn. It let the pilot know that the gears
were not down and locked! |
| |
This photo shows the “artist” frisket
film I use to mask off the inside and outside of my canopies and windscreens.
This material is about .003″/.004″ thick, and leaves next to
“0” paint on a ridge line next to the film. Masking tape leaves
a ridge line due to its’ thickness. This material does not bend, nor stretch.
With lots of “T & E” and “C & F” you can do
it!; (trial and error – cut and fit). Sometimes I cut the same piece 2-3-4
times, until I get what I want, as I’m fussy and so is my client. |
| |
All said and done, here’s a few shots of the
finished cockpit. |
| |
Go to part
four |
© Rodney
Williams 2002 |